


Planning to run an online business or work as a freelancer? Then you will need a payment mode to receive and send money. And there is nothing more reliable than PayPal. It is one of the oldest and most trusted payment service used for online money transactions.
Especially if you live in Asian countries or in the United States, PayPal is the best service for revising payment from your clients. For people who love to blog, most of the advertising networks prefer paying the users through PayPal. Hence, it’s best to have an account on the platform for easy money transactions.
In this article, we’ll tell you the complete process of creating your PayPal account from scratch and getting it verified. Once you are verified, you can start receiving money from jobs or businesses you are working with.
How to Create a PayPal Account?
First, you need to visit paypal.com on your browser. From there, click on the “Sign Up” button. On the next screen, you will have the option to choose from two types of accounts.
Choosing ‘Individual Account’ would mean you can only send payments. You will be able to pay for your shopping with this kind of account. But you won’t be able to receive any money if you go with an individual account.
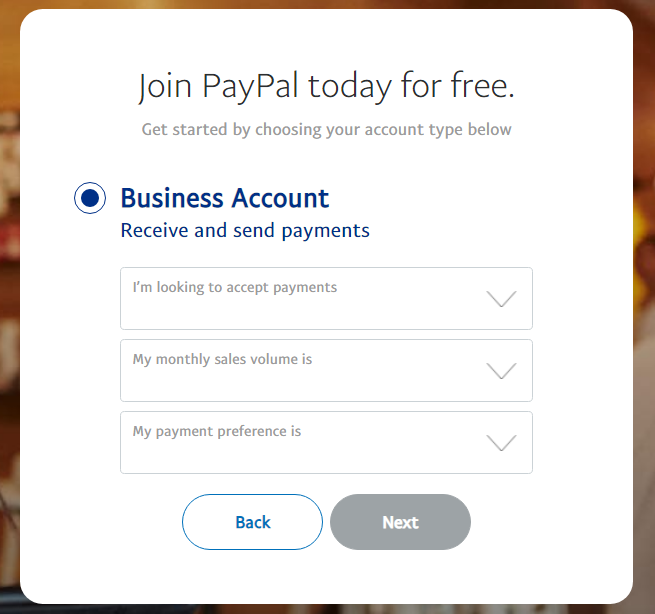
Choosing ‘Business Account’ will offer your the ability to send and receive money from other users, businesses, clients, and much more. This kind of account is suitable for people who want to receive payments or are sellers, freelances, or a business. But you will need to get KYC completed before you can start receiving payments.

If you chose to create an individual account instead, you can always upgrade it to a business account later as well. Keep in mind there are no charges for creating either type of account.
If you are going to accept money from businesses or clients, then go with ‘Business Account’. Click next, on the next page you will have three options to choose. Choose the options that are suitable for your case, and click Next. Enter the email address that you want to associate with your Paypal account. Remember, this cannot be changed later. Choose a strong password for your account and click submit.
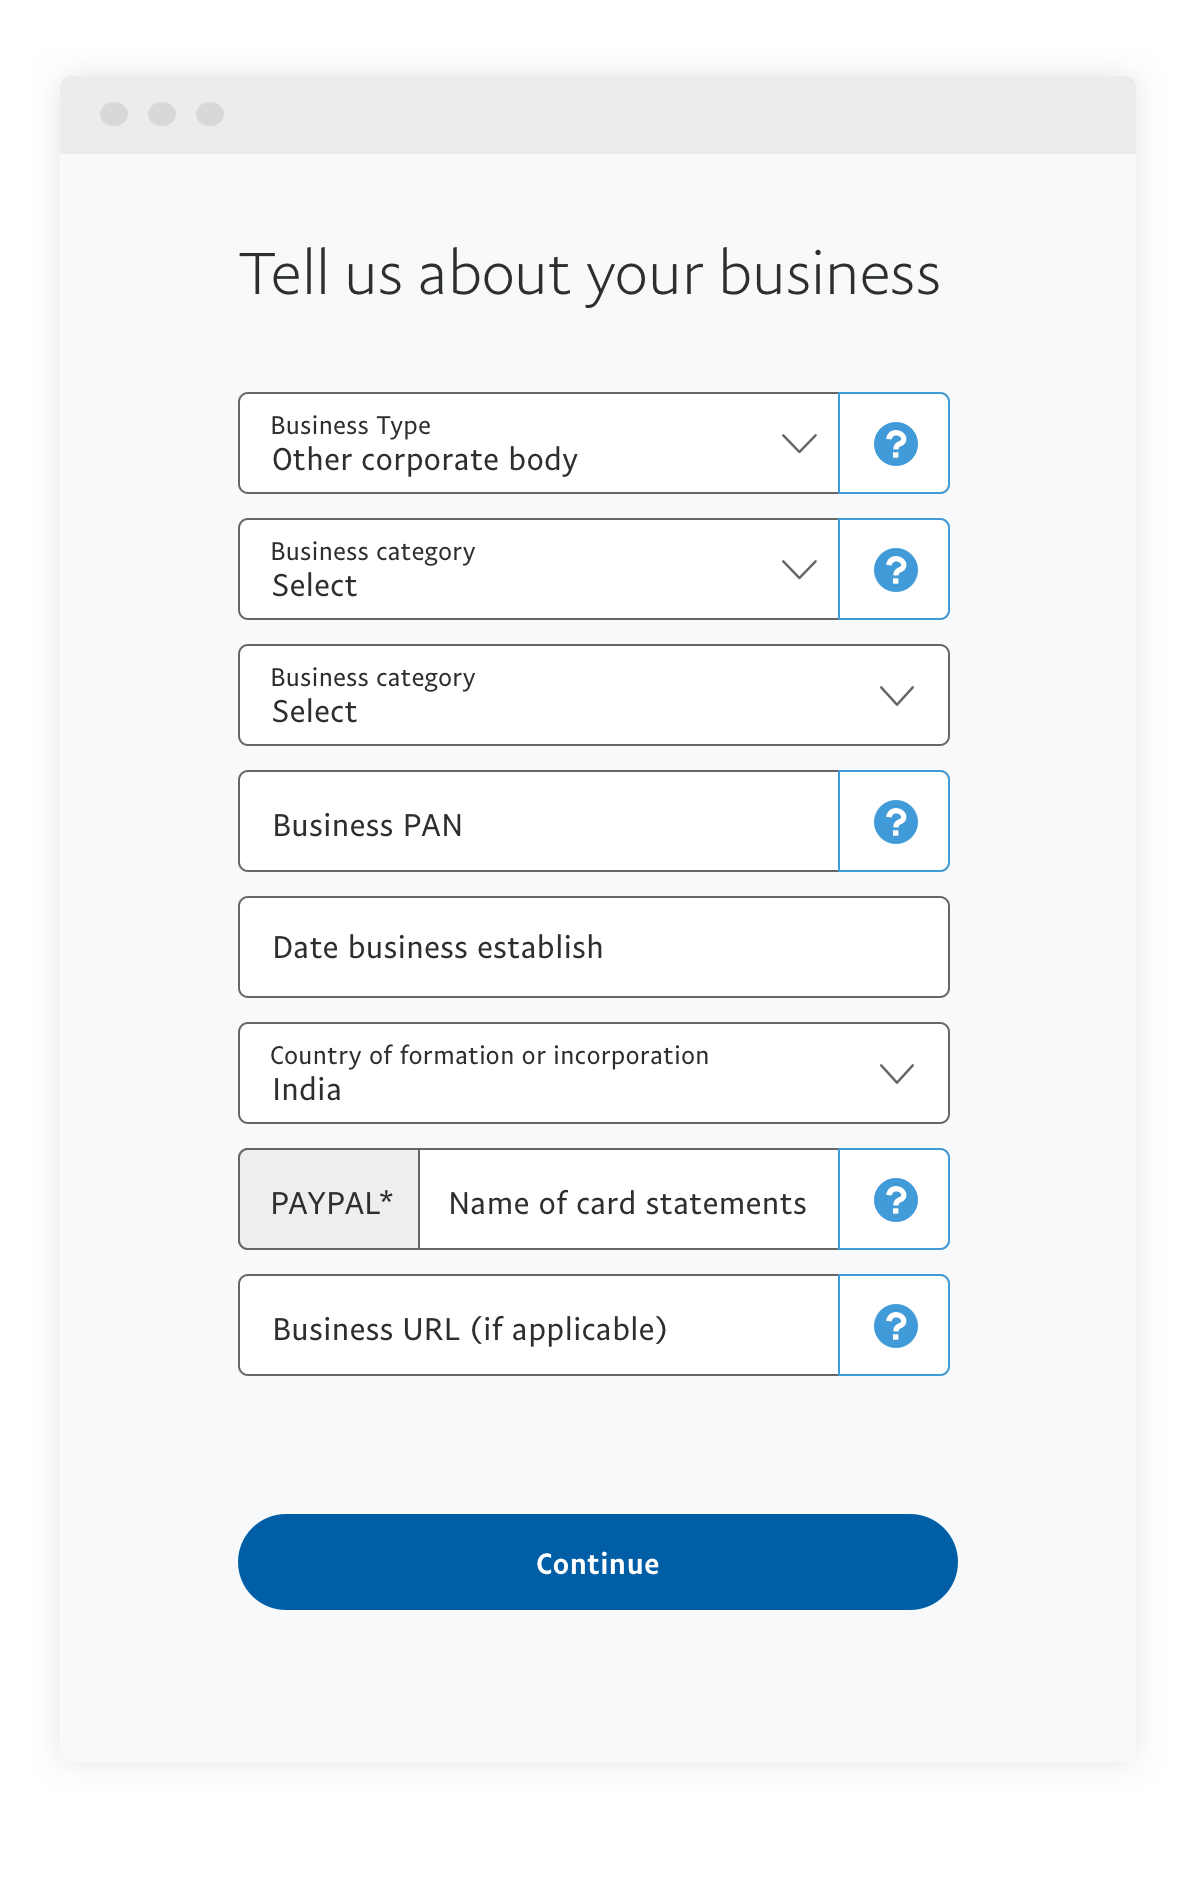
On the next page, you will need to choose the type of business. If you are an individual, choose “Individual’ otherwise choose the one that explains you the best. Fill up the complete form accordingly and click ‘Submit’.
For people opening an account in India, they will need to verify a few things before they can start receiving money from others. You will need to add your PAN Card number, confirm the email address that you used to sign up with. Then add a bank account, this is where your PayPal money will be withdrawn to. And the last one is ‘Purpose code’, where you have to choose why you are receiving the payments on your account.
The name of your PayPal account should be the same as your PAN Card. minors who are trying to open a PayPal account in the name of their parents, since you will not have a PAN card at the moment.
Link Your Bank Account With Your PayPal Account
Linking your bank account with your account can take some time, so it is suggested that you start the verification process right away if you want to start receiving money as soon as possible.
Click on “Payments Methods” and then click on ‘Link a bank account’. You will need to add your name (same as it is on the account), your bank account number, and the IFSC code of your bank branch.
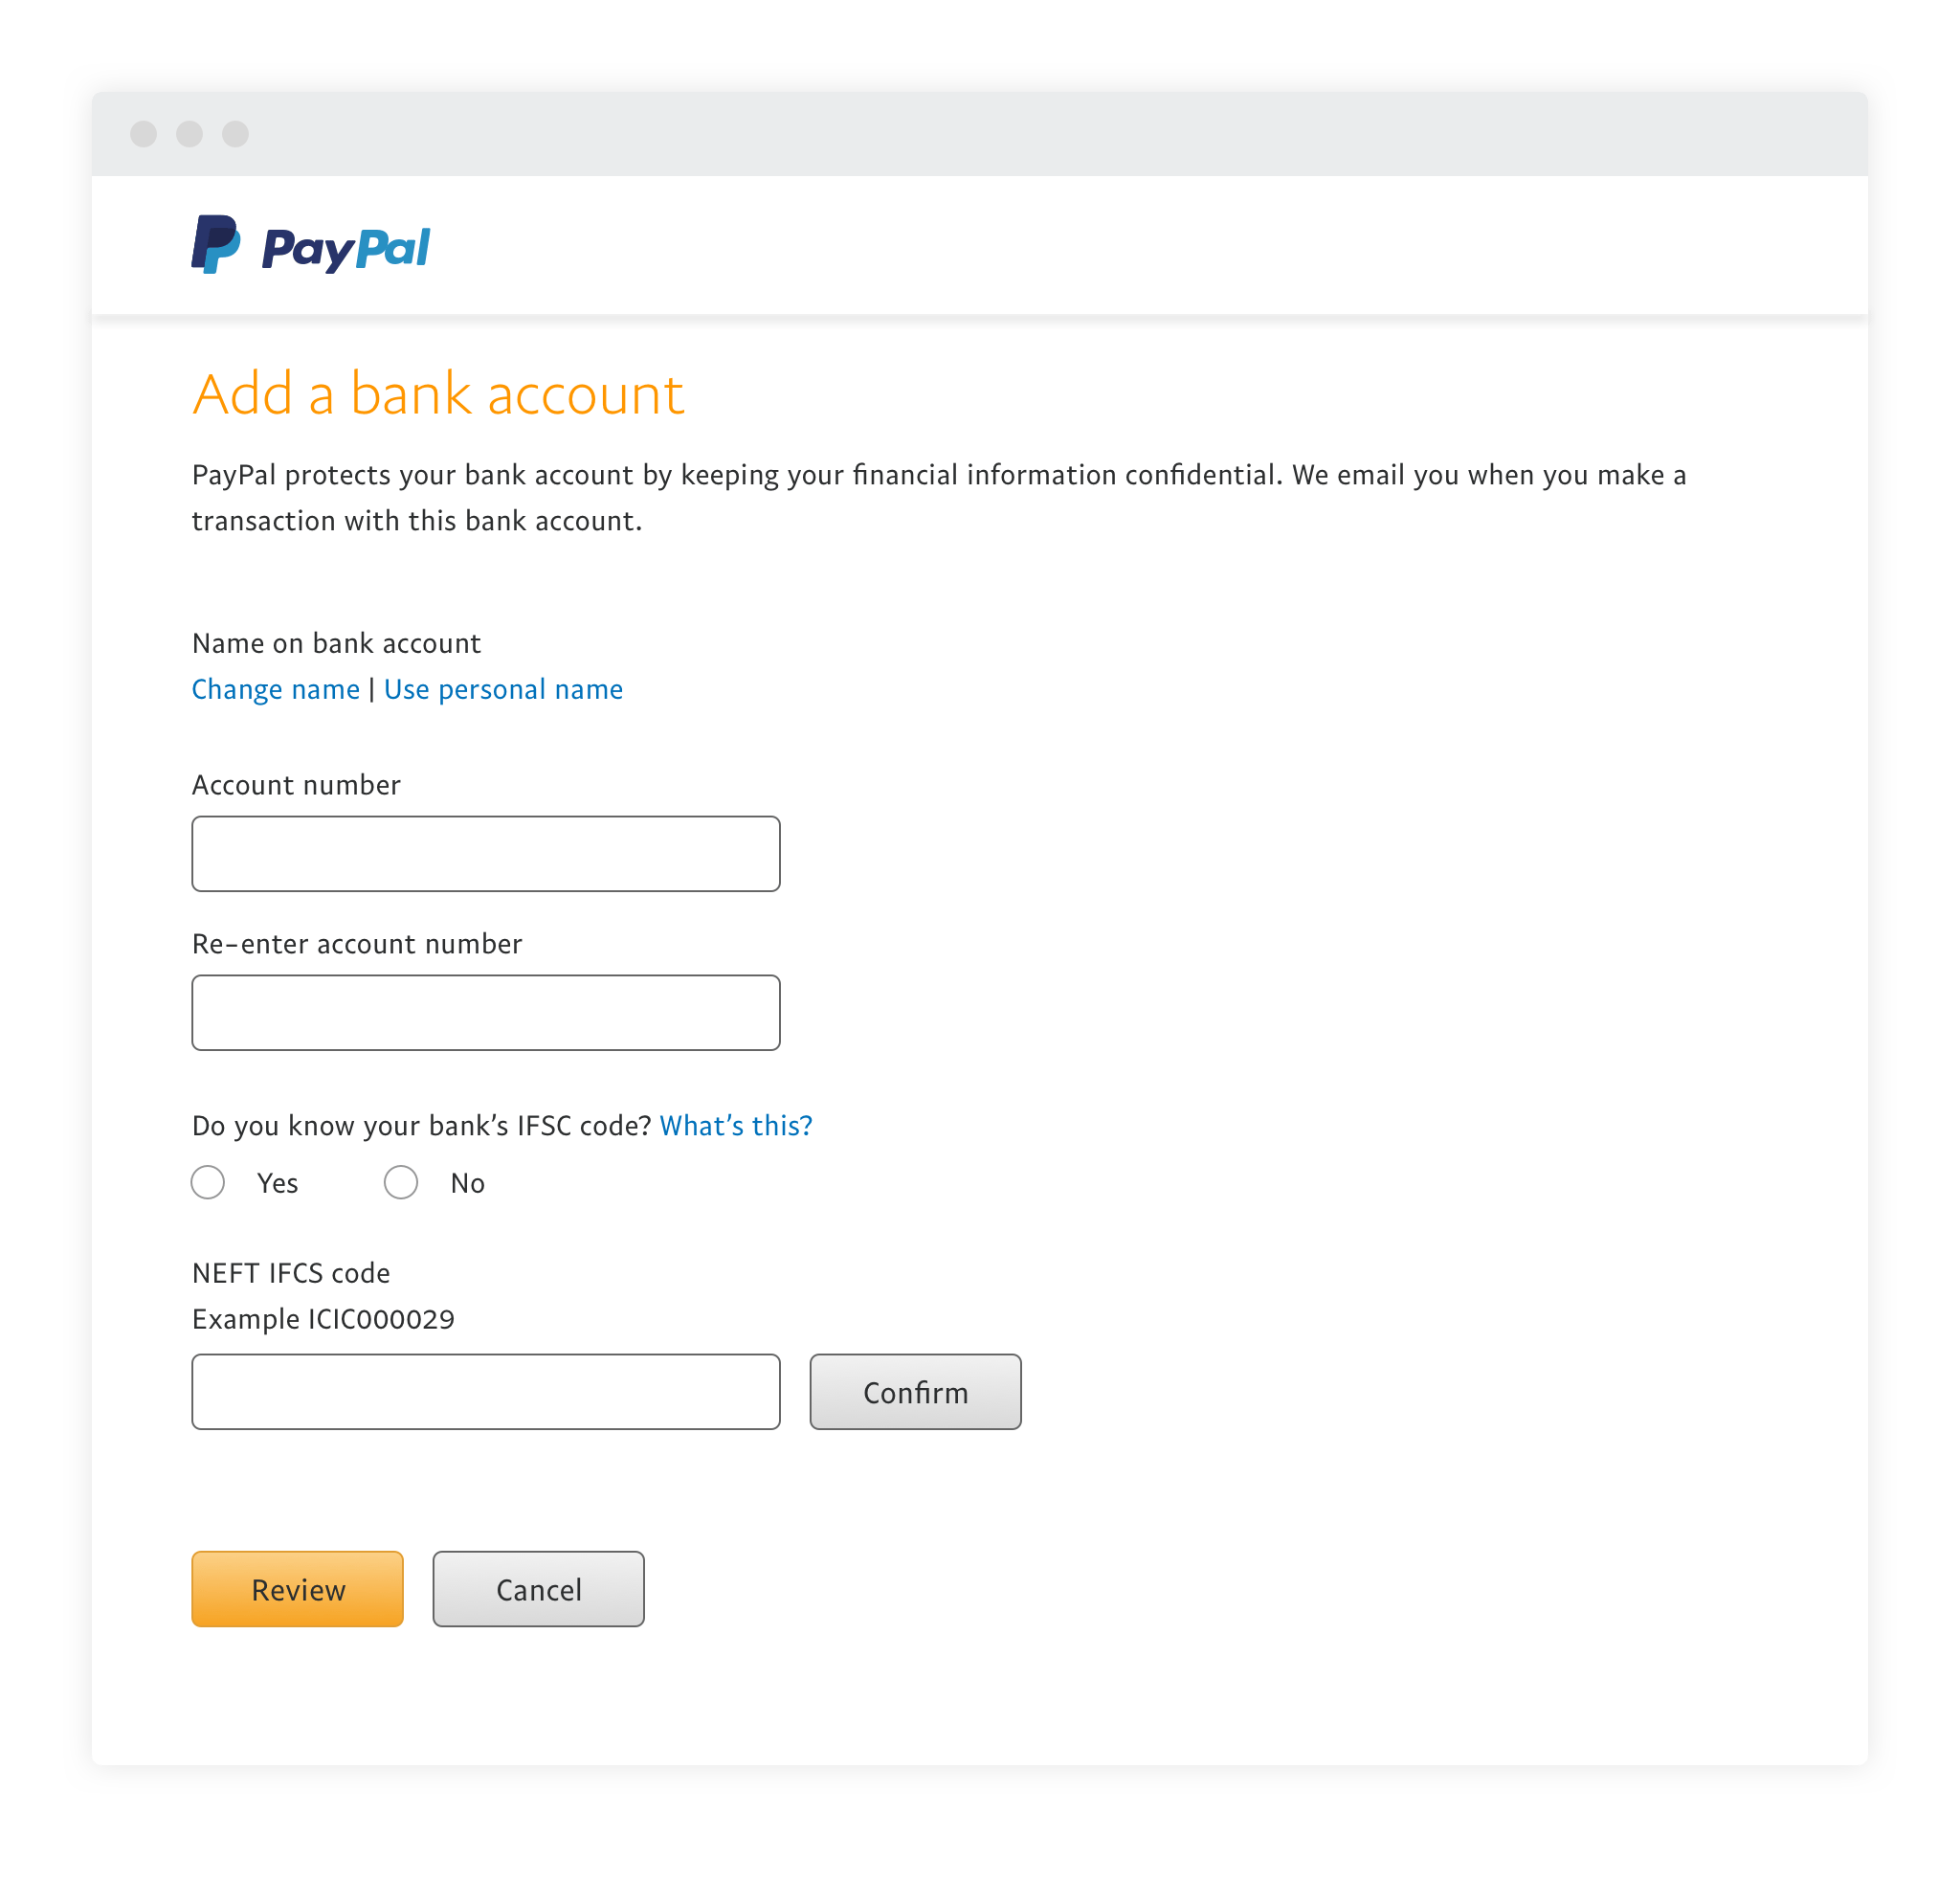
The IFSC code can be found in your checkbook or on your bank’s official website. If you still cannot find it there, just do a search on Google with your bank’s name and location with the term ‘IFSC code’ and you should be able to get it. Just make sure you cross-check from multiple links if you are searching on google, just to be extra sure.
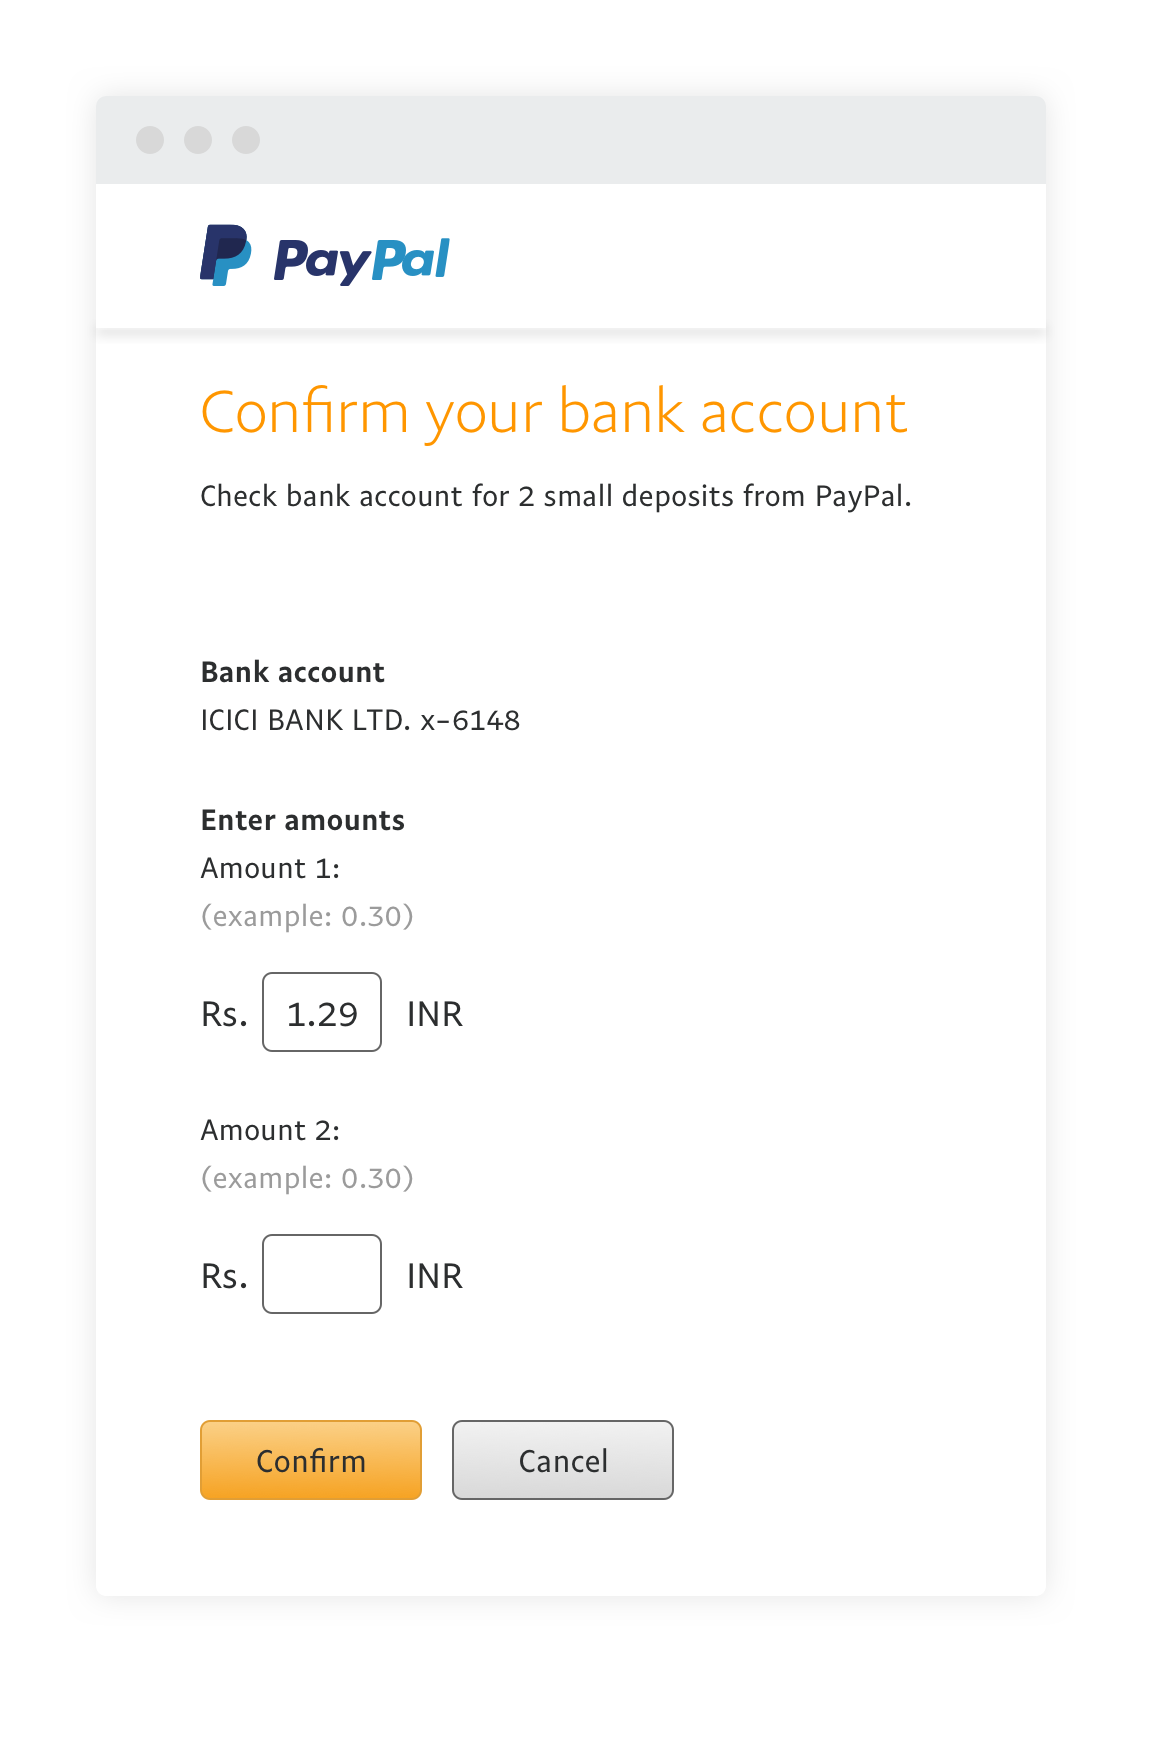
After you are done with filling the details just click ‘Link Your Bank’. To verify your account, PayPal will send two small deposits to your account. Once you have received the payment, come back to your account and click verify and resume the bank account verification. Enter the amount PayPal sent you in the respective boxes and click confirm. If you did everything correctly, you will have a verified bank account now.
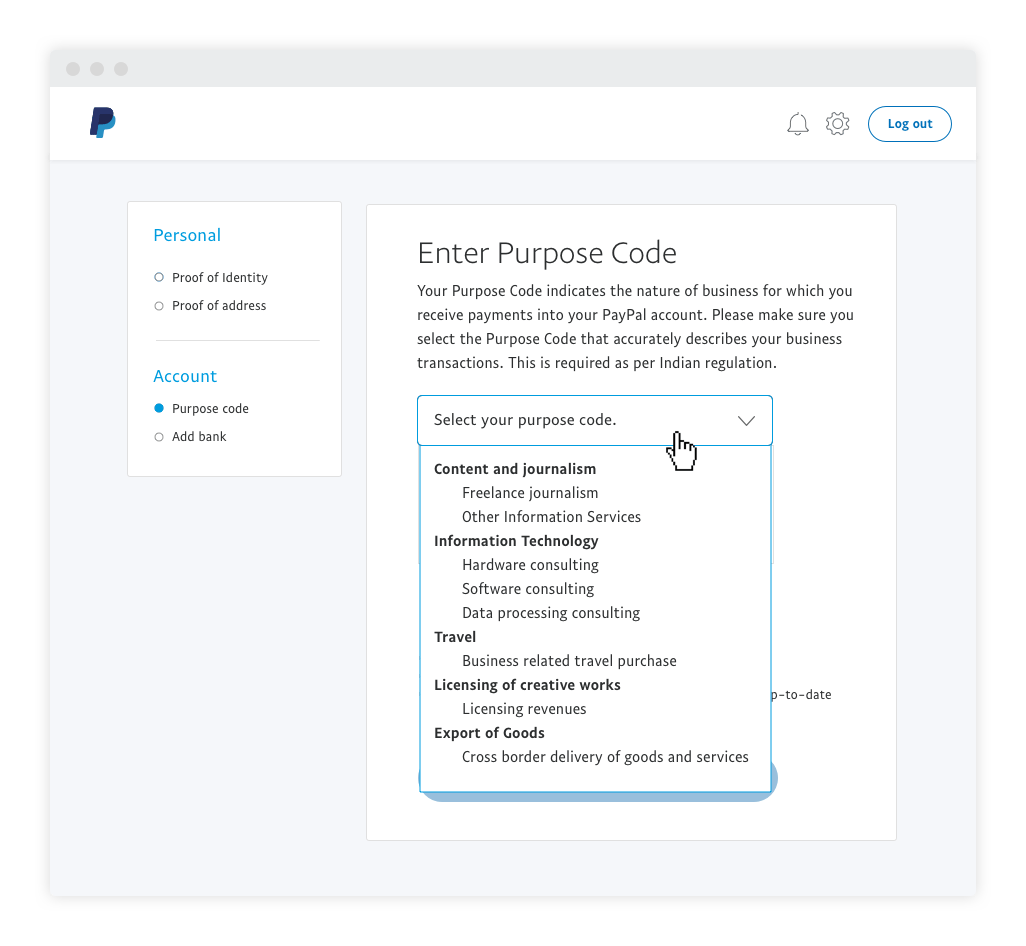
Purpose Code
Next, you will need to add a purpose code in your PayPal account. There will be a long list of options that you can choose from, select the one that is most accurate in your case. For example, if you are receiving affiliate payment, you can choose ‘advertising and marketing research’ as your purpose code.
Now you have a verified PayPal account and you can start receiving money from business and your clients, even from other countries as well.
Link a Credit or Debit Card
Linking a credit and debit card is pretty easy compared to adding a bank account on PayPal. To link a card to your account, visit ‘Payment Methods’ from the dashboard. On the top left, choose ‘Link a debit or credit card’, then click on the first option. You can also link your ICICI Pockets account if you own one.

On the next page, enter the details of your card, then click on ‘Link Card’. Your card should be verified within a few moments and you can load your account or pay from your PayPal account using these accounts. The process is similar for both credit and debit cards.
Closing
And there you have it, it’s not that difficult to create and verify a PayPal account, and it doesn’t take a lot of time either. Create an account for yourself today, even if you don’t need it right now, it can come in handy in the future.


